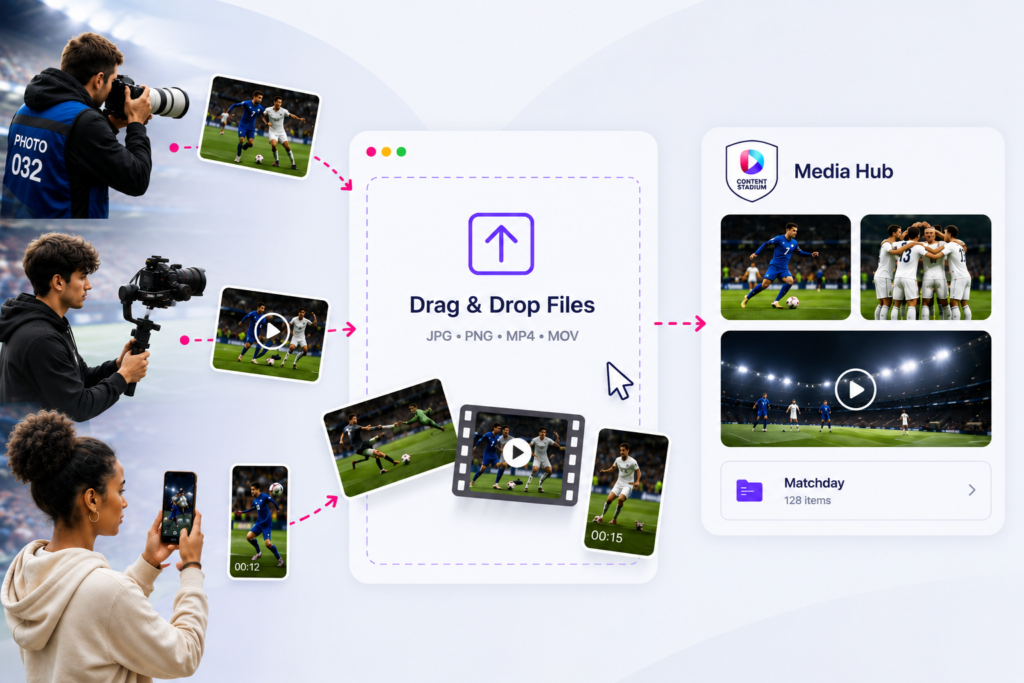
The external upload link feature allows photographers, videographers, content creators or other external contributors to upload media directly to your Media Hub without needing a Content Stadium login.
Simply create a secure upload link, share it with contributors, and all uploaded files will automatically appear in the selected Media Hub folder.
Step 1: Create an External Upload Link
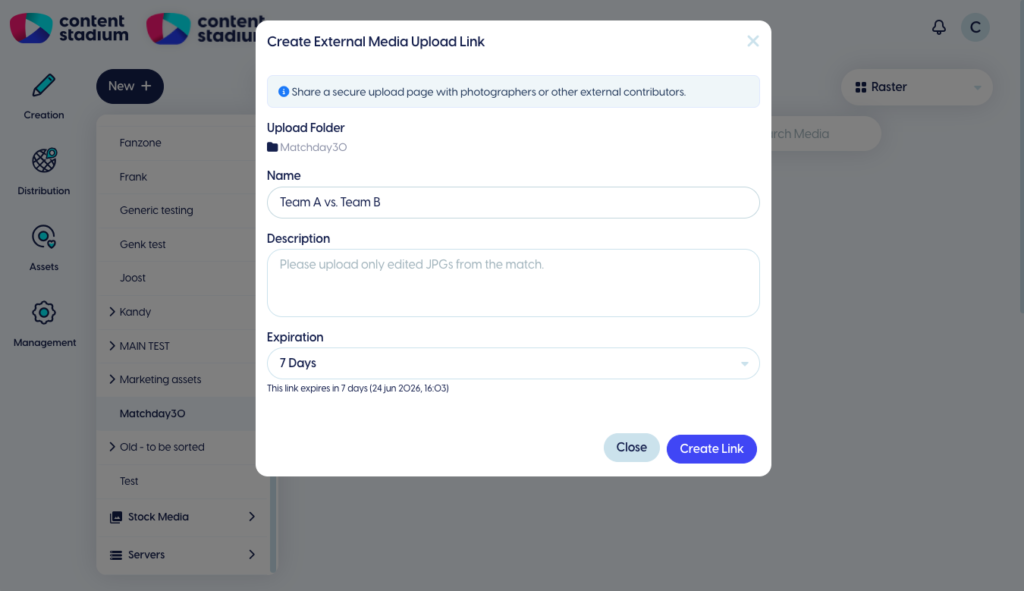
In the Media Hub, open the folder / create the folder where incoming media should be stored (Matchday30).
Inside the selected folder, click the arrow next to Upload Media and select Via External Link.
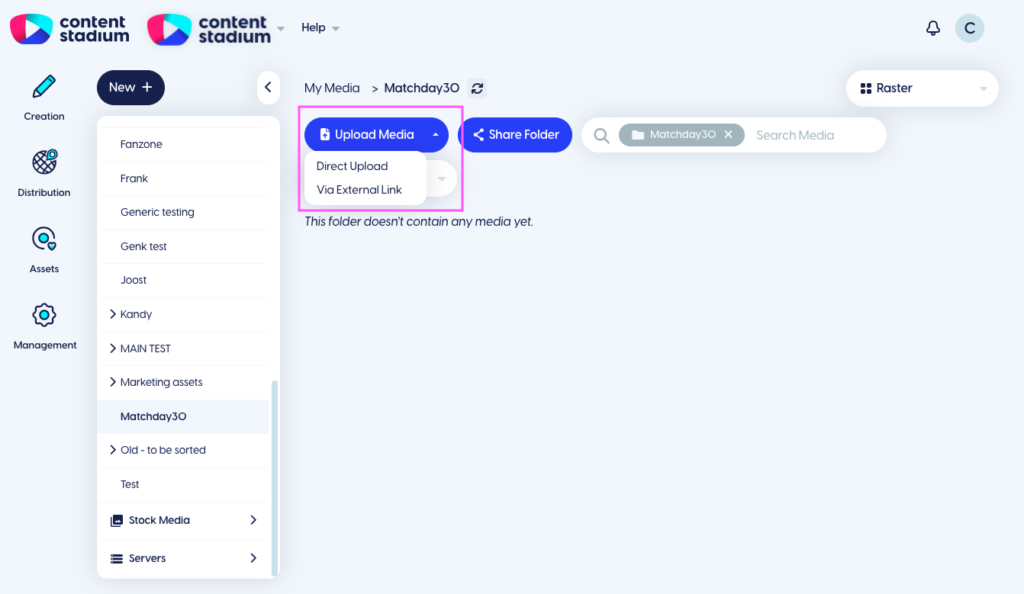
The window Create External Media Upload Link will appear.
Complete the fields Name and Description and choose how long the upload link should remain active (Expiration).
Once completed, click Create Link.
Step 2: Share the Upload Link
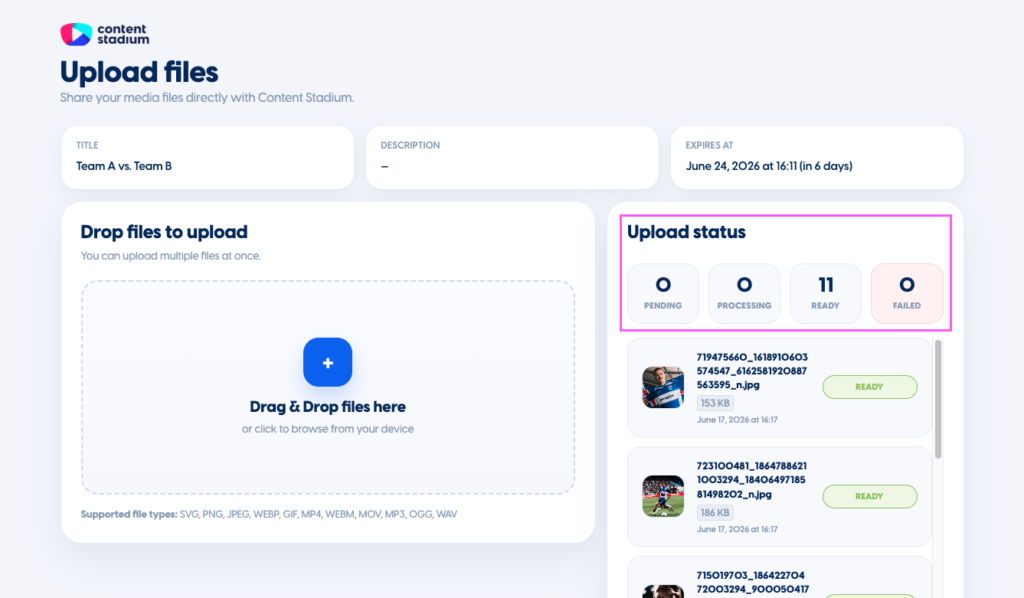
After creating the upload link, copy the generated URL and share with photographers, videographers, content creators, or other contributors.
No Content Stadium login is required.
Step 3: Upload Files
When contributors open the link, they will see a dedicated upload page.

Users can drag and drop files into the upload area or click the + in the upload area to browse files from their device.
Multiple files can be uploaded simultaneously.
Supported file types include: SVG, PNG, JPEG, WEBP, GIF, MP4, WEBM, MOV, MP3, OGG, WAV.
Once the files reach READY, the upload has been completed successfully.
Step 4: Find Your Files in Media Hub
Click the refresh button to load the latest uploads.
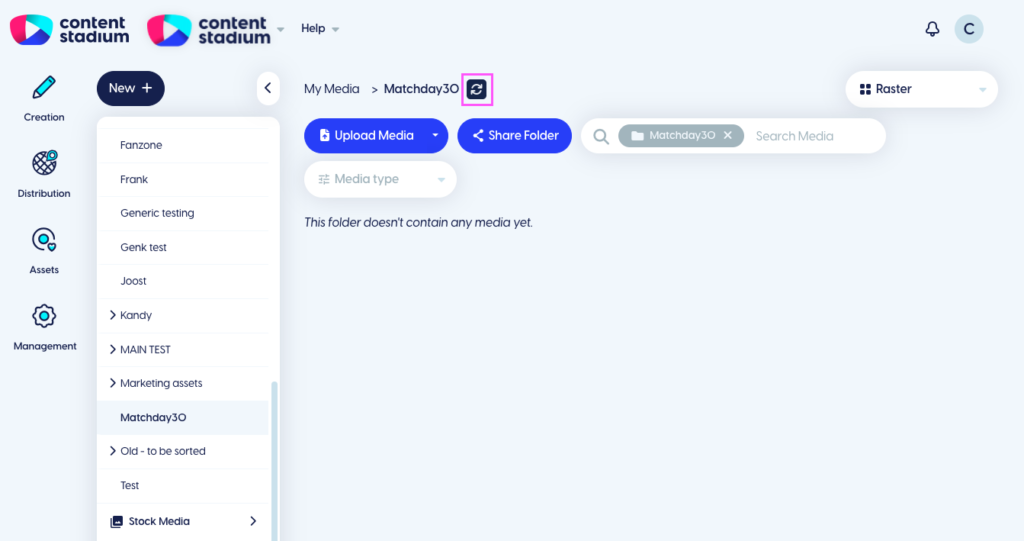
Newly uploaded files will appear automatically in the selected folder.
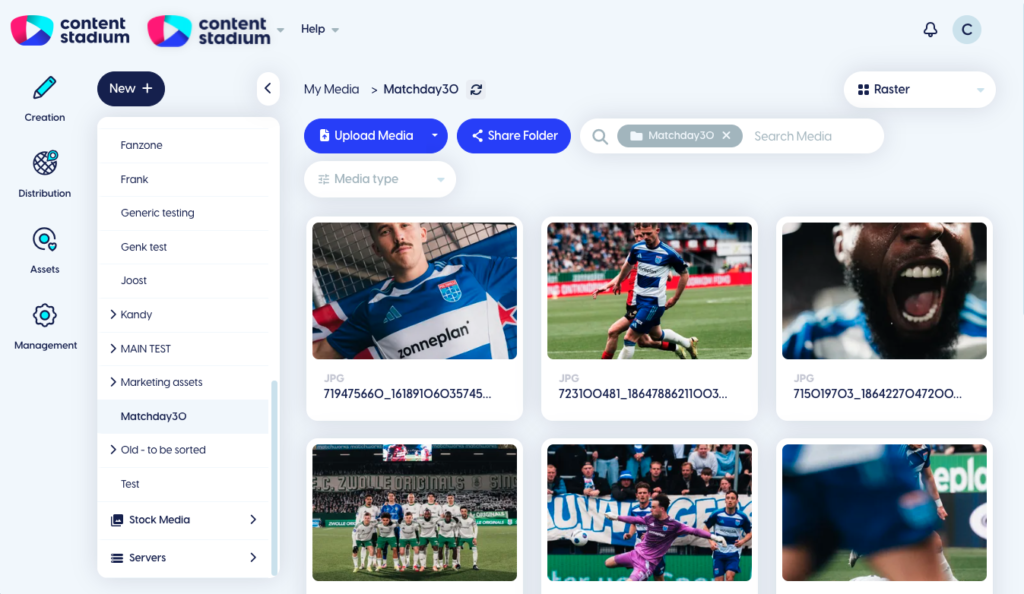
Using AI-powered facial recognition, the platform automatically adds relevant tags to your media.
This makes it easy to quickly find the right content later using Media Hub search.
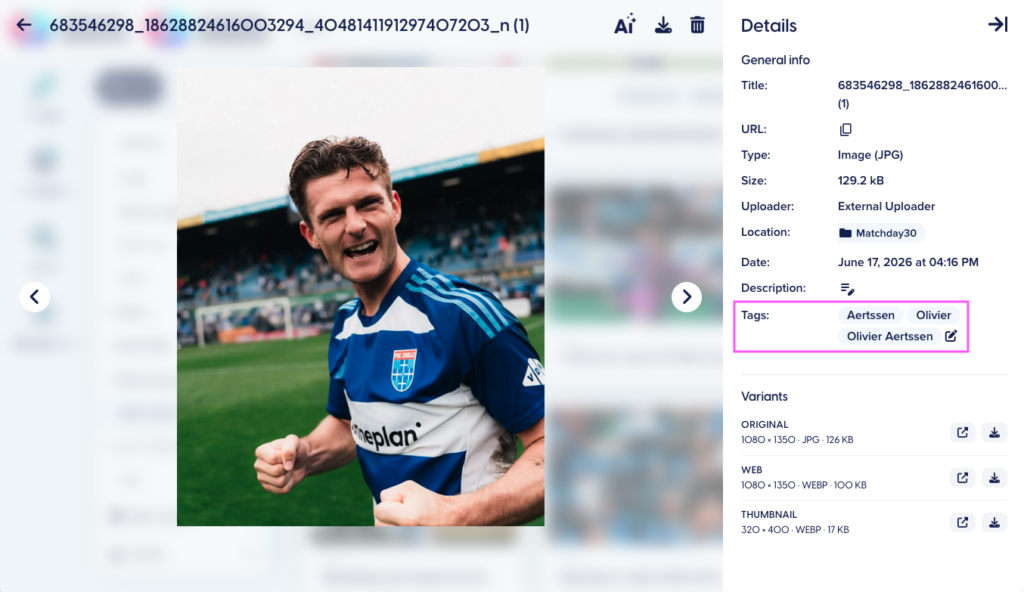
Every uploaded image is automatically stored in multiple formats and resolutions. This allows different teams and departments to use the same image for different purposes

Need a Visual Walkthrough?
Watch the step-by-step video tutorial here:
Got more questions?
Reach out to your dedicated Customer Success Manager for more assistance.