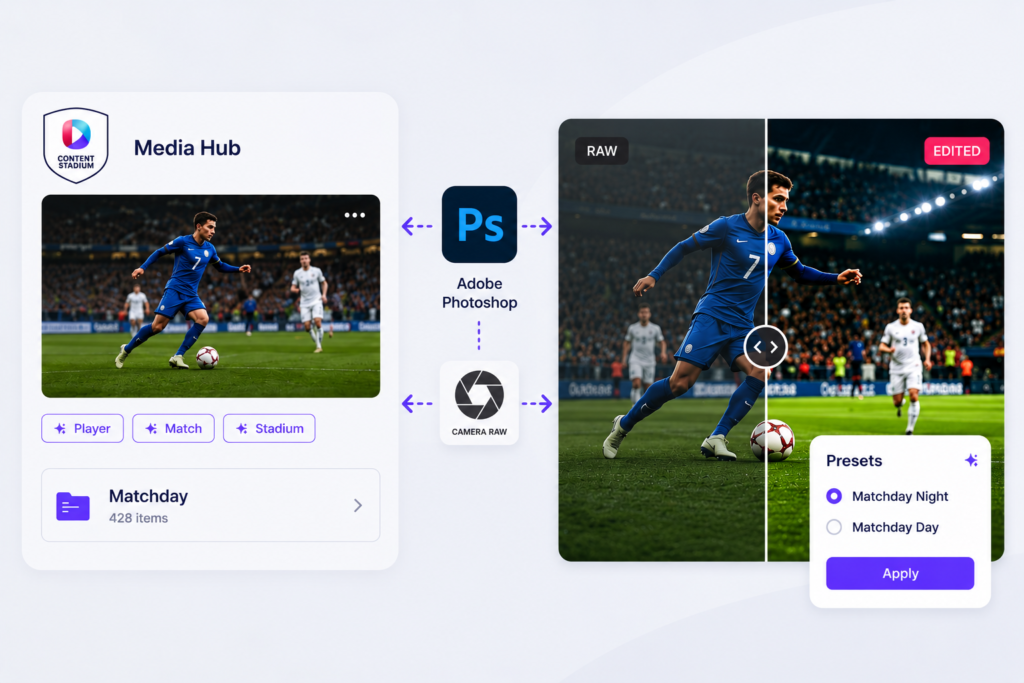
Content Stadium’s Photoshop Plugin allows you to open images from your Media Hub directly in Photoshop, apply edits or presets, and publish the edited image back to Content Stadium.
This is useful when you want to apply your own photo filters, Lightroom presets, or manual Photoshop edits while keeping the edited image connected to your Content Stadium workflow.
Step 1: Download and Install the Photoshop Plugin
Before you can edit images from Content Stadium in Photoshop, you need to install the Photoshop Plugin once.
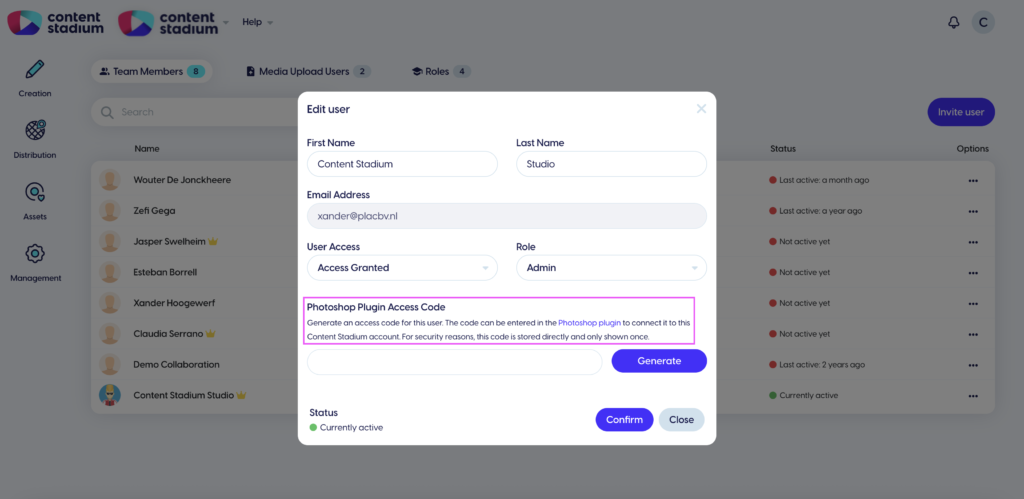
Navigate to Management → Team.
Click the three dots next to the user you want to connect and select Edit
Click the blue text Photoshop Plugin to download the plugin.
This will download a CCX file.
Open the downloaded CCX file to install the plugin via Adobe Creative Cloud.
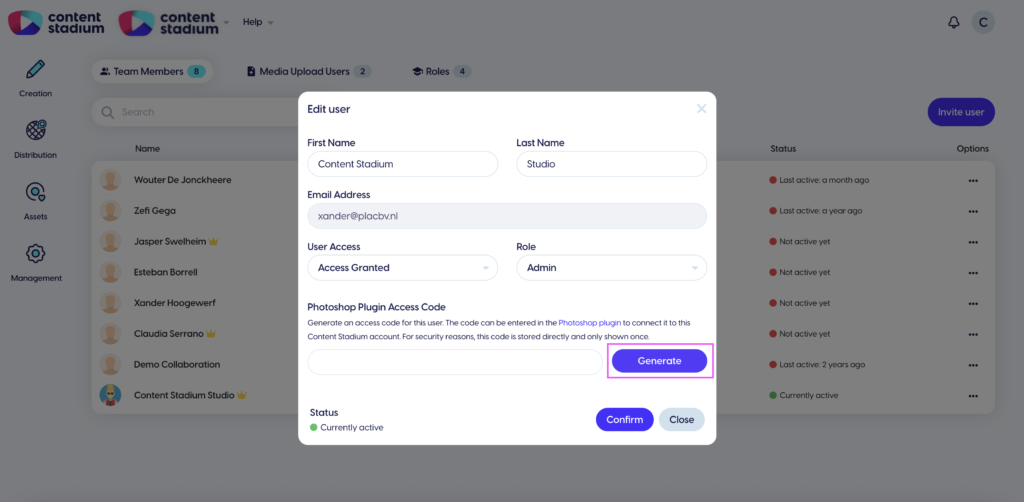
Step 2: Generate Your Access Code
Once the plugin has been installed, go back to Content Stadium.
In the same user settings screen, generate your access code by clicking Generate.
This access code is needed to connect your Content Stadium account with Photoshop.
Step 3: Connect Photoshop with Content Stadium
Open Photoshop.
In the Photoshop Plugin panel, enter the access code generated in Content Stadium and click Connect.
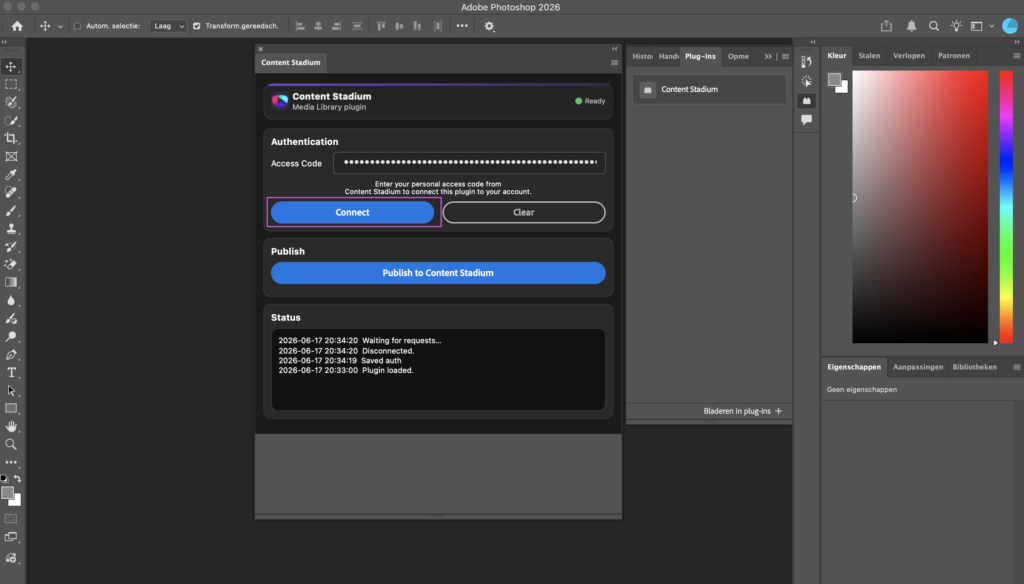
Once the code has been accepted, Content Stadium and Photoshop are connected.
You only need to complete this setup once.
Step 4: Open a Photo from Media Hub
In the Media Hub, select the image you want to edit and click Open In Photoshop.
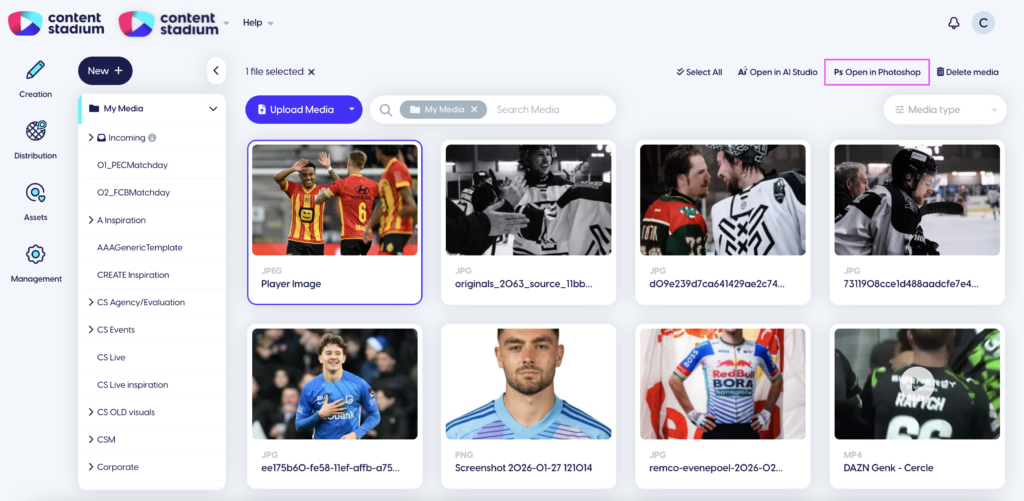
The image will open directly in Photoshop, ready for editing.
Step 5: Apply Your Preset and/or Edit
Once the image is open in Photoshop, you can apply any edits you need.
Top apply a Lightroom preset (XMP), go to Filter in Photoshop.
Click Camera Raw Filter.
In the Camera Raw panel, open the preset menu.Upload or select the preset you want to apply.
Make any final adjustments if needed and click OK to apply the changes.
Step 6: Publish the Edited Image Back to Content Stadium
Once your edit is complete, open the Photoshop Plugin panel.
Click Publish to Content Stadium.
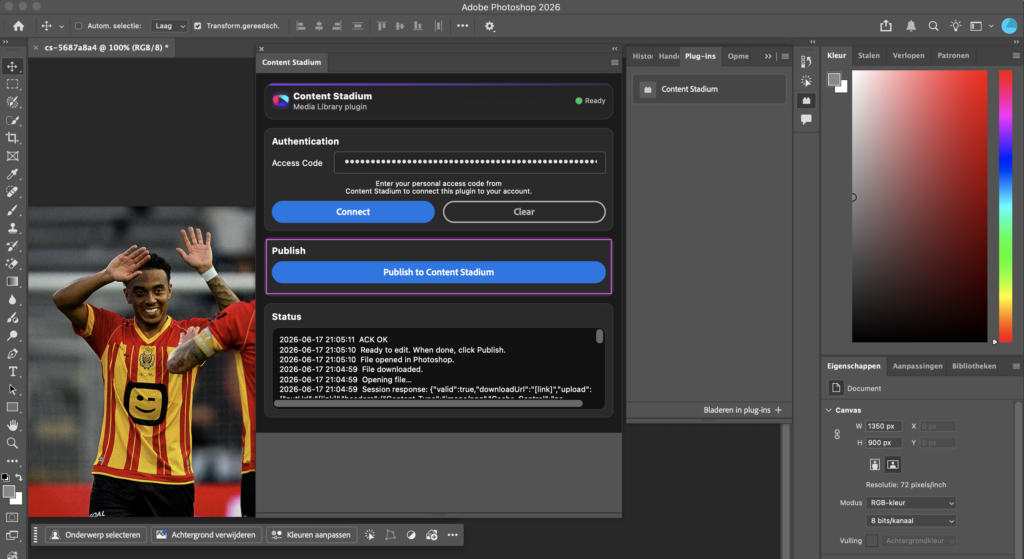
Your edited image will be uploaded back to your Content Stadium Media Hub.
Step 7: Find Your Edited Image in Media Hub
Return to Content Stadium and refresh your Media Hub.
Your edited image will appear in your library.
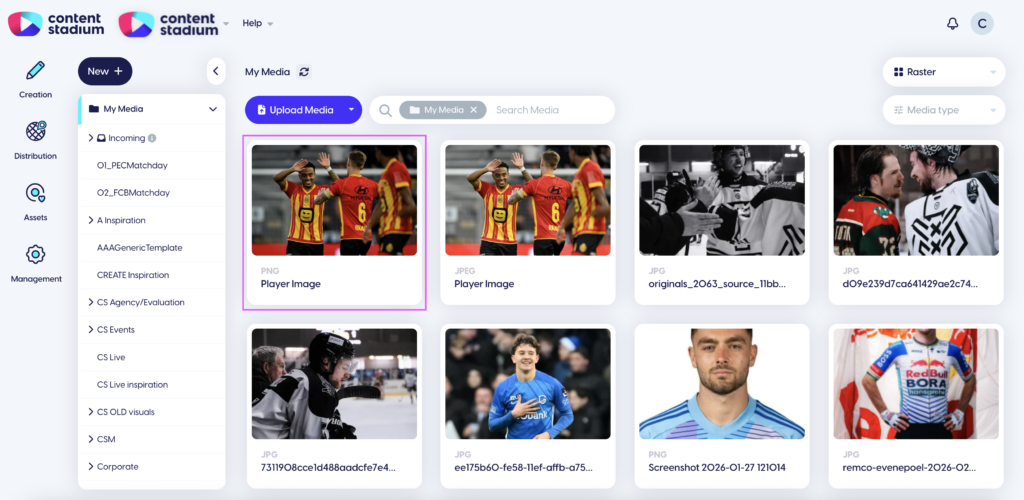
Once published, Content Stadium will automatically detect and tag players in the image and generate multiple file-size versions.

Need a Visual Walkthrough?
Watch the step-by-step video tutorial here:
Got more questions?
Reach out to your dedicated Customer Success Manager for more assistance.