

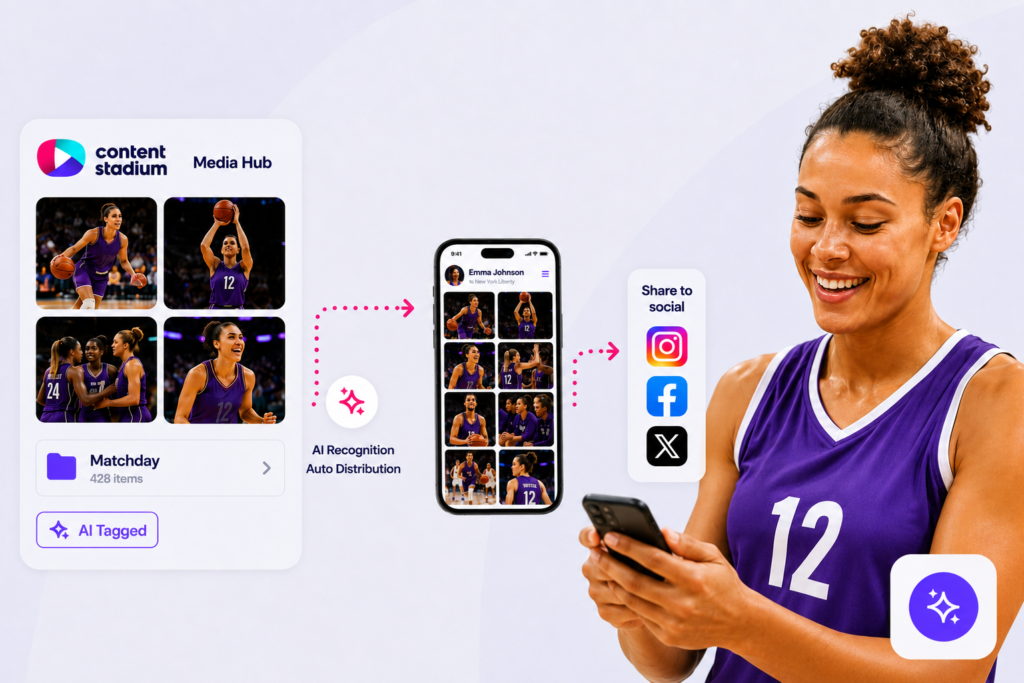
Getting started with the Content Stadium Athletes App only takes a few minutes.
Once an athlete has been invited, they can quickly register.
In this guide, you’ll learn how to set up the Athletes App for your organization and guide athletes through the registration process, so they can start accessing their photos and videos.
Step 1: Invite an Athlete
To invite an athlete to the Content Stadium App, first add them as a member in Network.
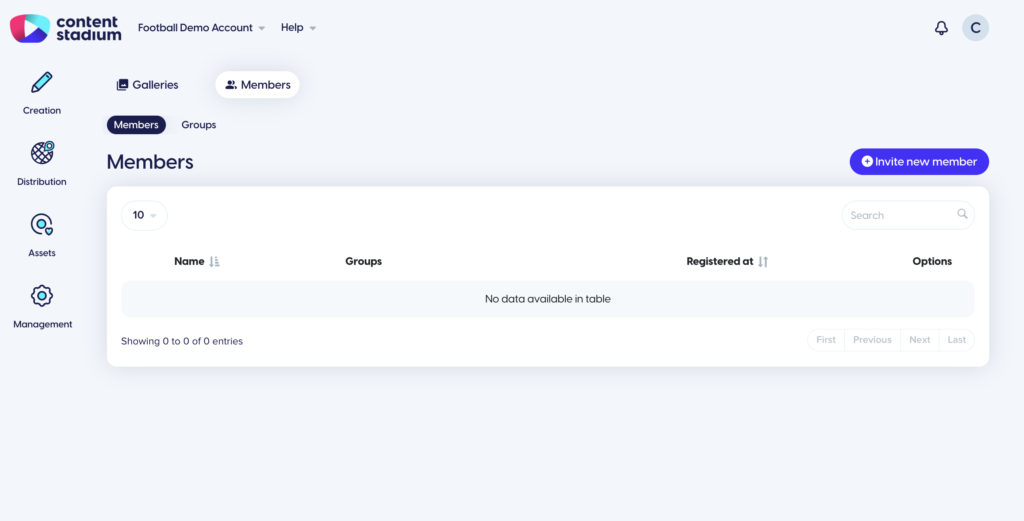
Navigate to Distribution → Network and open the Members tab, located next to Galleries.
Next, click Invite new member in the top-right corner.
Fill in the athlete’s First Name, Last Name and Email Address.
For the Tags field, enter the athlete’s first name and last name, separated by a space (for example: Kylian Mbappé).
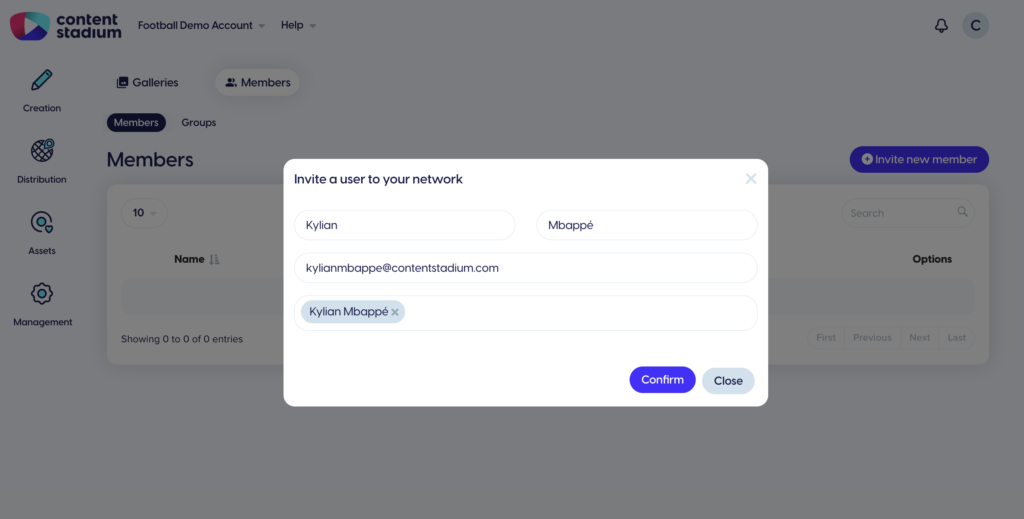
Thanks to Facial Recognition, this ensures that photos of the athlete are automatically recognized and tagged.
Once you’ve entered the required information, click Confirm.
The athlete will now appear in your Members overview.
Step 2: Ask Athletes to Download the App
Before sharing the unique link, ask your athletes to download the Athlete’s App on their mobile device.
The app is available for both iOS and Android:
- Download from the Apple App Store
- Download from the Google Play Store
Important: Make sure the app is installed before the athlete click their authentication link. This allows the link to open the app automatically and pre-fill the athlete’s registration details.
Step 3: Copy and Share the Authentication Link
Once the athlete has installed the Content Stadium App, copy their unique authentication link from the Members overview in Network.
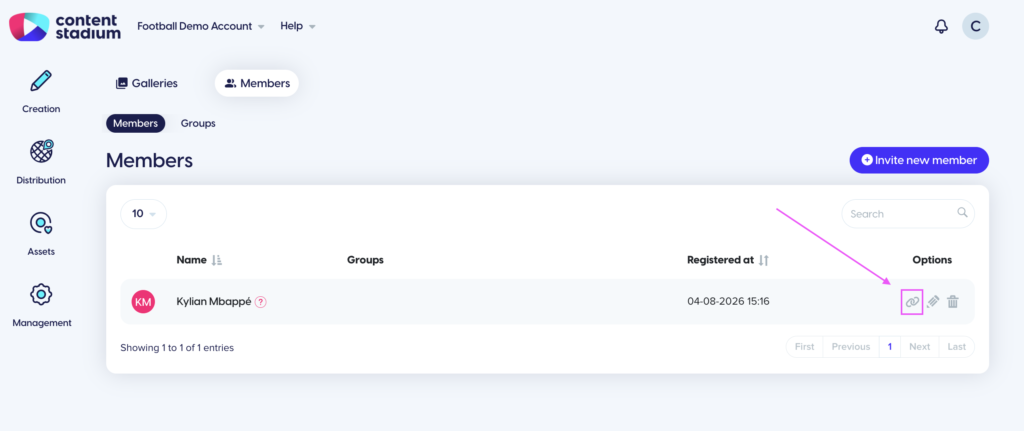
Share the link with the athlete.
Step 4: Let the Athlete Register
Ask the athlete to open the authentication link on the same mobile device where the app is installed.
When the athlete clicks the link, the app opens automatically.
The athlete’s email address and invite code are already filled in.
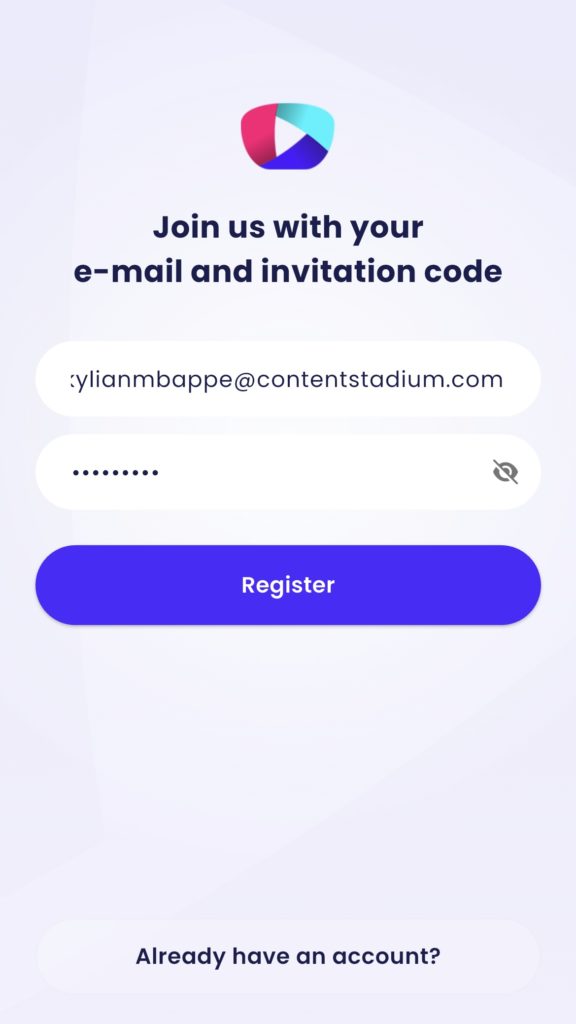
Step 5: Let the Athlete Complete Their Profile Registration
After clicking Register, the athlete is asked to enter:
- First Name
- Last Name
- Password
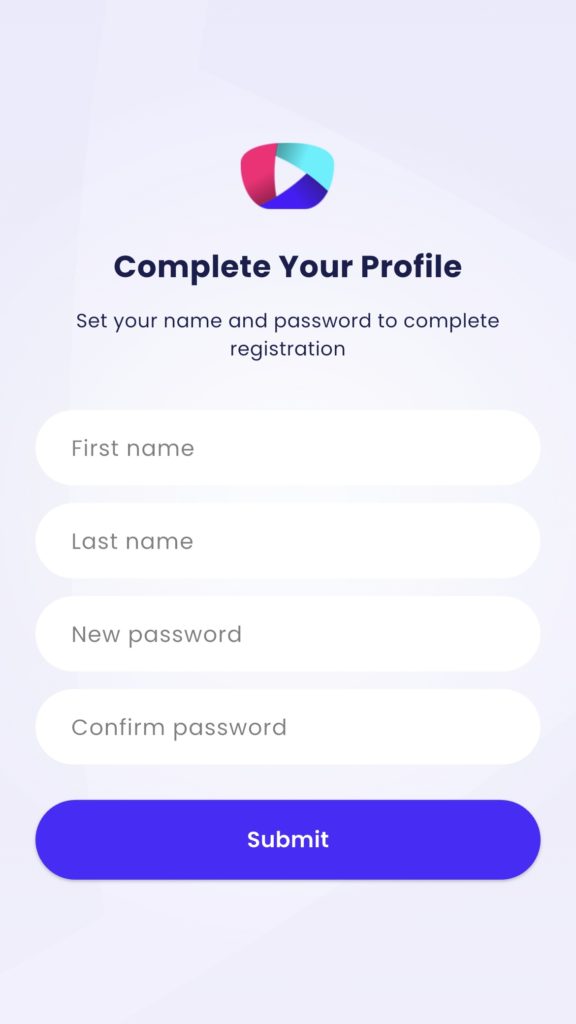
Once all fields have been completed, the athlete clicks Submit.
Their account is now activated, and they are taken directly to the app.
Step 6: Share a Folder with Your Athletes
Once your athletes have registered, you’re ready to start sharing media.
Navigate to the folder you’d like to share in Media Hub and click the Share Folder button.
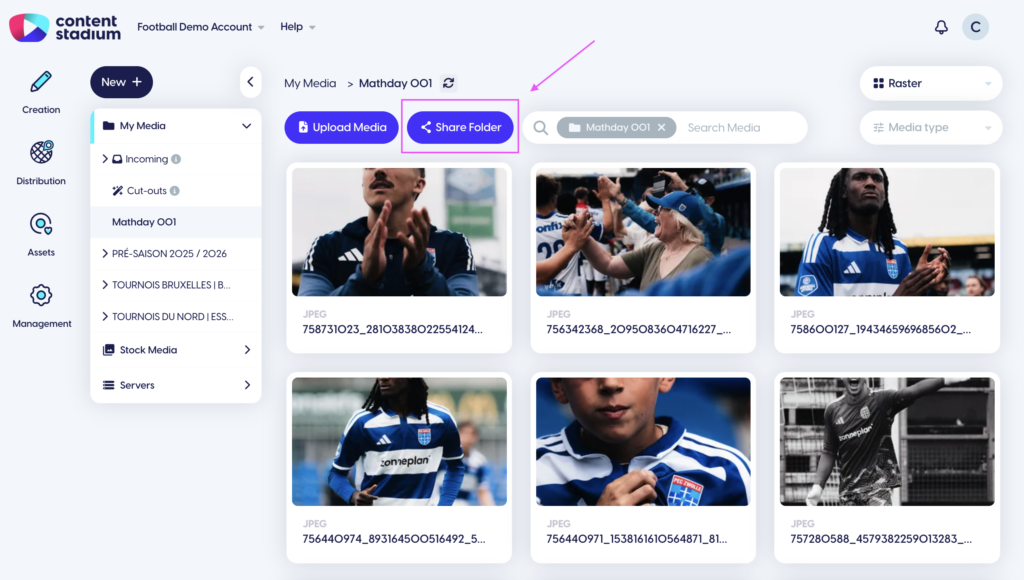
The folder will immediately become available in the app.
Step 7: Let Athletes Access & Use Their Media
Once you’ve shared a folder, the athlete will immediately receive access to the media in the app.
In the My galleries environment, they’ll find all the different folders that have been shared with them.
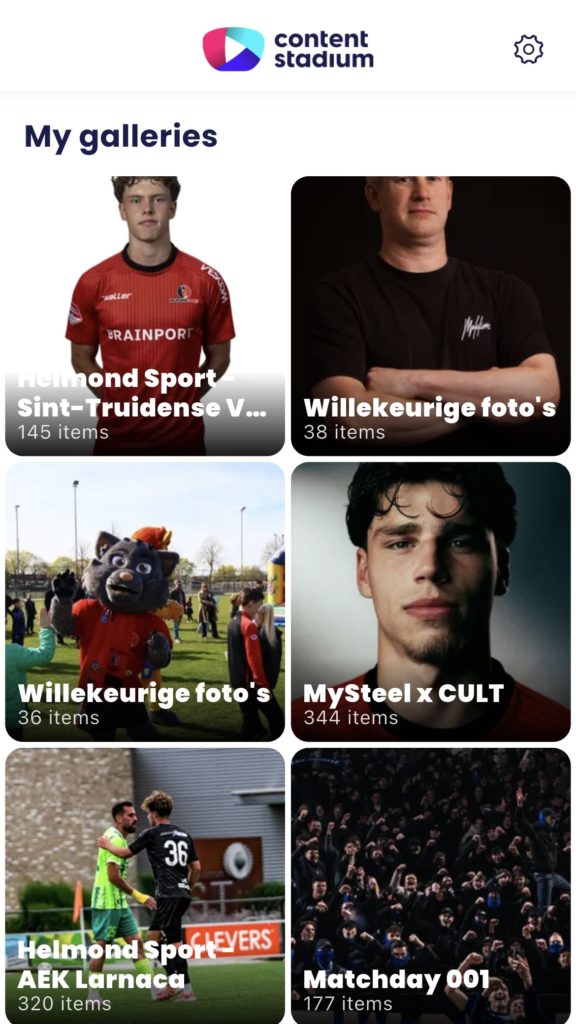
Inside the folder, they can switch between two views:
- media: displays all photos and videos in the shared folder.
- my media: displays only the photos that contain the athlete.
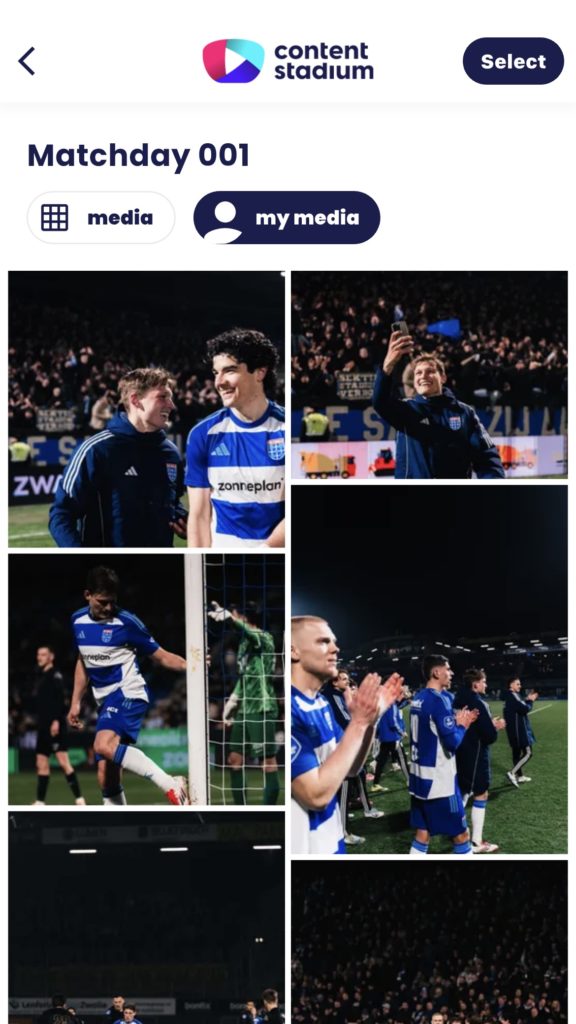
Thanks to Facial Recognition, the my media view automatically filters all images of the athlete within that folder, making it quick and easy to find their own media.
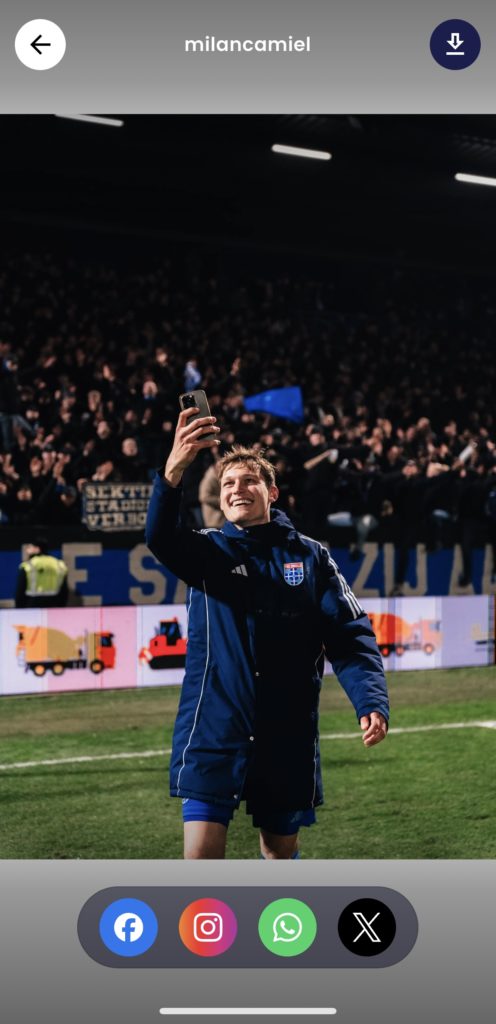
To view a photo in full screen, the athlete simply taps the image. From there, they can:
- download the image by tapping the download icon in the top-right corner
- instantly share the image directly to their social media channels using the sharing options at the bottom of the screen
Got more questions?
Reach out to your dedicated Customer Success Manager for more assistance.