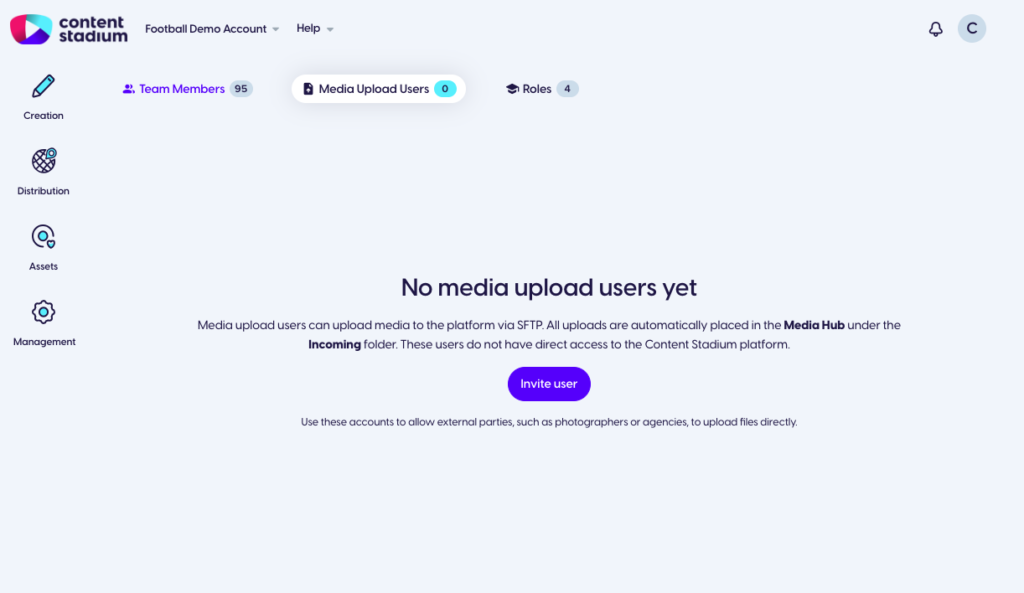
Step 1: Add a Media Upload User
To allow a photographer, videographer, or external content creator to upload files directly to your Media Hub via SFTP, you first need to create a Media Upload User.
Navigate to Management → Team.
In the tab Media Upload Users, click Invite user.
Enter the user’s: First Name, Last Name and Email Address. Click Confirm.
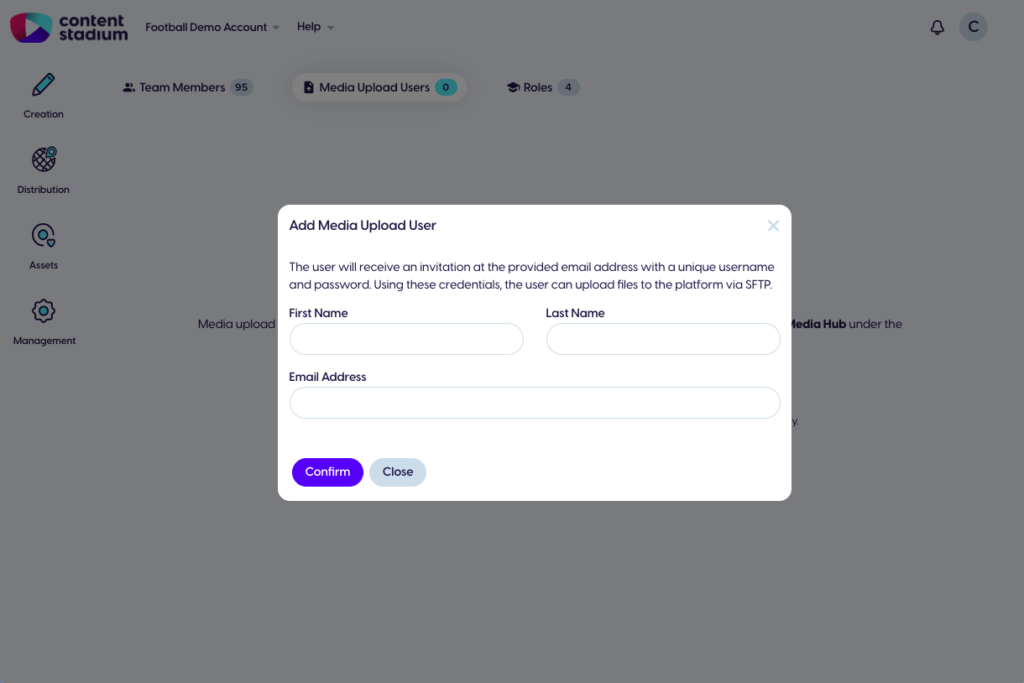
Once created, the user will automatically receive an email containing their unique SFTP credentials, including: Host, User, Password.
Step 2: Install an SFTP Client
We recommend FileZilla (free): https://filezilla-project.org/
Download FileZilla Client and install it.
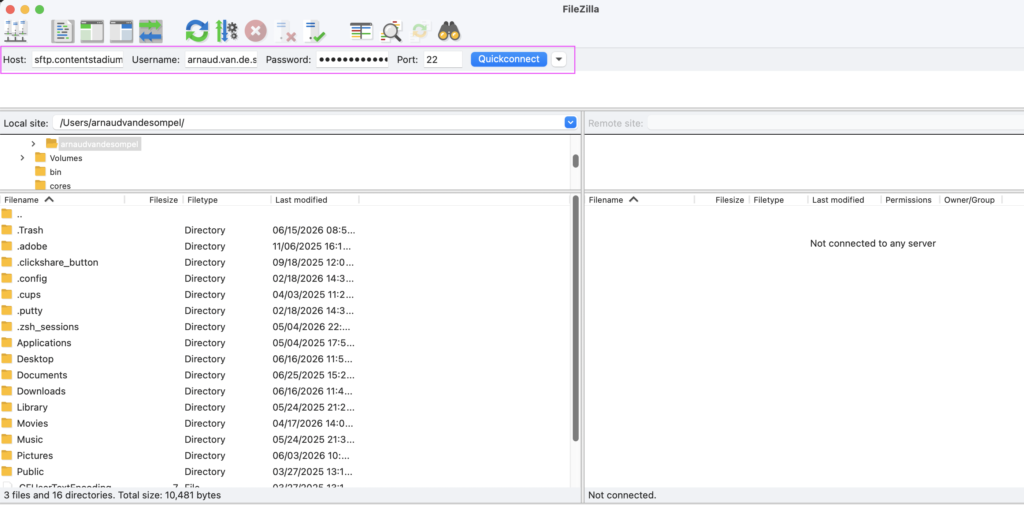
Step 3: Connect to the Server
To connect to Content Stadium using FileZilla, enter the following details in the Quickconnect bar at the top of the application:
Host: sftp.contentstadium.com
Username: Use the username provided in the email
Password: Use the password provided in the email
Port: 22
Once all fields have been completed, click Quickconnect.
Step 4: Create a Match Folder
Once the SFTP connection has been established, you can create folders for your uploads.
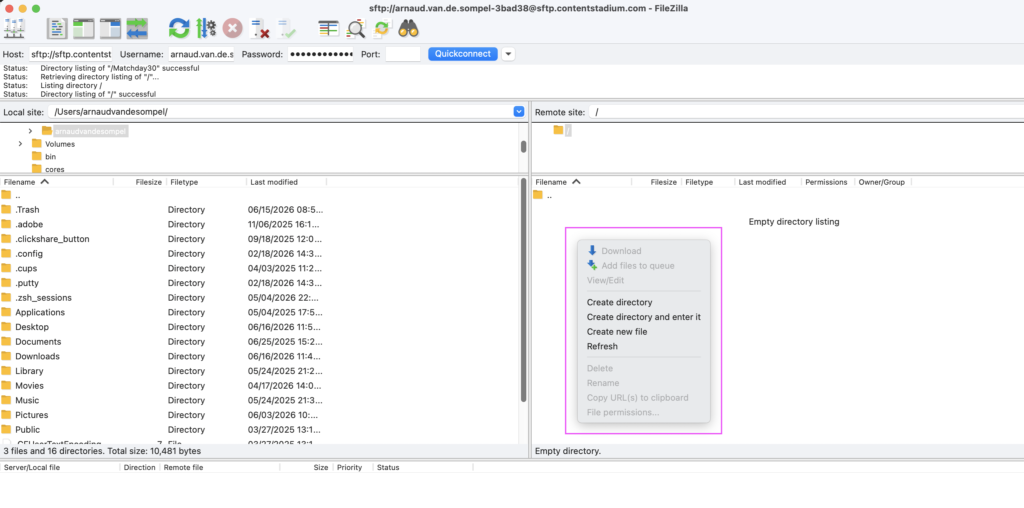
In the Remote Site panel on the right-hand side of FileZilla, right-click anywhere in the empty space and select Create directory.
Enter a folder name (e.g. Matchday30) and click OK to create the folder.
Step 5: Upload your Photos
Open the folder you created and drag and drop your images from your computer into the folder.
FileZilla will immediately start uploading the files to Content Stadium.
Once the upload has been completed, no further action is required.
Step 6: Find your Photos in Media Hub
Once your files have been uploaded via SFTP, Log into your Content Stadium account.
Navigate to Assets → Media Hub.
Click Incoming in the left-hand menu.
Your uploaded folder (e.g. Matchday 30) will automatically appear in the Incoming section.

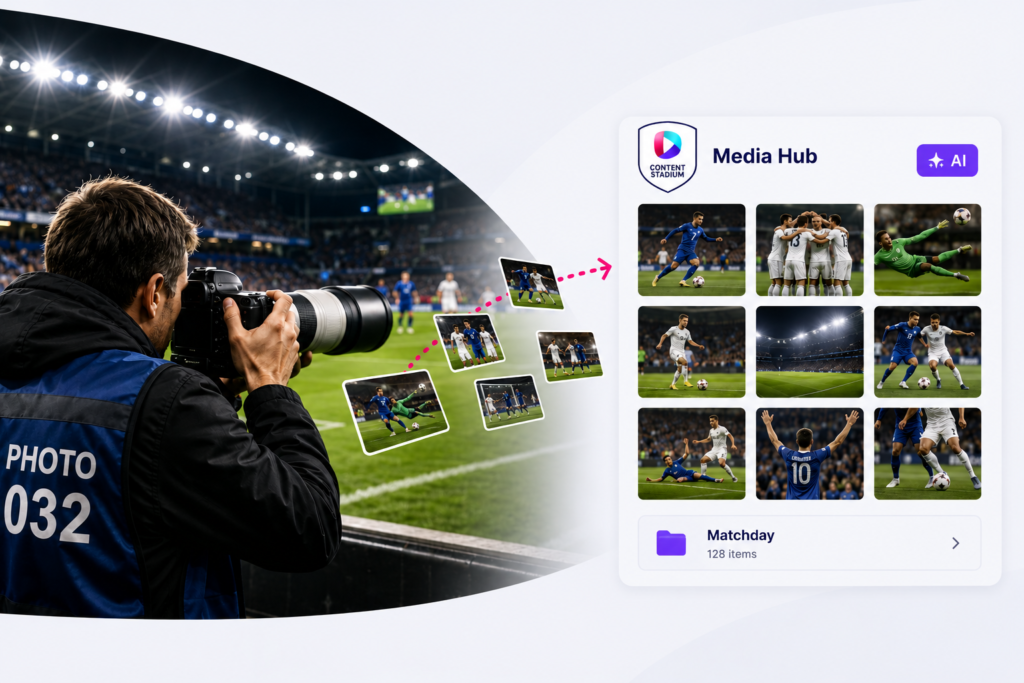
Need a Visual Walkthrough?
Watch the step-by-step video tutorial here:
Got more questions?
Reach out to your dedicated Customer Success Manager for more assistance.